Posts

Showing posts from 2015

DIY: Grocery Bags!

Image
Marking the Nepali New Year 2072 B.S., the capital city of Nepal - Kathmandu is going "Plastic Free Zone". I'm here to present how to upgrade your plain and boring grocery bags (for which I'm very excited about!) SUPPLIES: 1. Grocery Bags 2. Sharpie Pens 3. Design (of your choice) It's pretty simple, I drew my favorite liners and characters in the bag with "sharpies", make sure to use the permanent ones!  (CAUTION: try to keep it away from the rain!) 1. Discover the crazy in YOU! Namas'cray: the crazy in me recognizes and honors the crazy in you. 2. Lil Miss Shopaholic: Shopping is an art. I am an artist. RESPECT please. 3. Which GoT House you belong to? Winter in coming: House of Stark Fire and Blood: House of Targaryen Hear Me Roar: House of Lannisters Say it in Dothraki What do you say to the God of Death? - NOT TODAY! Next time, you will not only shop till you drop - but also FLAUNT yo...

Pray for Nepal!

Image
Dear All, 7.8 rector earthquake hit Nepal on 25 April 2015, the devastating catastrophe has affected lots of parts of Nepal - Gorkha, Lamjung, Sindhupalchowk, Langtang, Lalitpur and Kathmandu etc. At this moment, we all need to be very strong for our country. Seeing helping hands coming from all over the world for Nepal - restores faith in humanity. Thank you. Please Pray for Nepal. Stay Strong Nepal. We will bounce back. Pictures Source: Internet

Pineapple Express!

Image
This post is related to 'how to wrap a Champagne for a gift'. As summer is around the corner, let's give a touch of "tropical thunder" while gift wrapping the champagne. Here, I have wrapped it as a pineapple. SUPPLIES: 1. Yellow Paper (for the Pineapple Body) 2. Green Paper (for the leaves) 3. Glues/ Scotch-tape 4. Markers 5. And of course, the Champagne bottle! Gifted Wrapped Champagne into Pineapple! Tropical Thunder! :) INSTRUCTIONS: Step#1: Wrap the body of the champagne bottle with a yellow paper. Step#2: Cut the green paper in a shape of leaves. Step#3: Paste the paper leaves on the neck of the bottle. Step#4: TA-DA! You have just transformed the champagne into a pineapple! Have FUN and Safe Drinking Guys!

Featured: Painted Flower Pot DIY!

Image
As I have been lazy these days, but my sisters (Puse and Manju) has been certainly walking on my footsteps *wink, wink*. Yet again, I featuring these duos for their awesome crafts which they did together. You can always try these at your home with your kids and friends as you must be having term break and now-and-then Nepal Band (General Strikes), so better utilize your time!!!  Le Petit (Flower) Pot by Puse Psychedelic Pot: We like to trance! by Puse The Music Lover: by Manju "Life is like a piano; the white keys represent happiness and the black show sadness. But as you go through life's journey, remember that the black keys also create music. ― Ehssan" Thank you Manju and Puse for letting me post your DIYs! :) ------------------------------------------ For instructions, please click the below links: Dressing Up Your Flower Pots! Geometric Shapes Flowerpots! DIY:Design Your Own Flowerpot  

April Fool's Day Special: Prankster Rock!

Image
This April Fool's Day, you can prank with this harmless DIY. Prankster Rock! I simply colored the rock with Disney inspiration, wrote "TURN ME OVER" on one side and "I CAN'T BELIEVE YOU JUST TOOK AN ORDER FROM A ROCK!" on the other. This rock has one hell of a sense of humor and I'm sure you agree with me! ----------------------------------------- If you liked this post, then you probably also like; For the Forgetful Gardener! I'm stoned. Rock on! Gee and The Chocolate Factory

Planning a Baby Shower!

Image
We had organized a small baby shower function recently in our office for our dearest colleague and sister - Amrita Didi, who is now almost due for April with her first child. In Nepal "baby shower" is popularly known as "Dahi Chiura" where mother-to-be is feed "Dahi & Chiura" (Curd & Beaten Rice) along with other varieties to have a safe delivery and healthy baby. 1. Baby Shower Invitation: I created an invitation for the event via picmonkey.   Guess Whooo is Almost Due... 2. Baby Shower Garland: It is very pretty easy to make, I cut out the onesies from the paper, wrote letters on it and stuck the onesies on the rope. For more tutorial, please click here. Baby Shower Garland 3. Surprise#1: Pregnancy Announcement Tee: We surprised her with the hand-painted pregnancy announcement t-shirt, as we could not find one. I'm sure, seeing the baby in blue, everyone is guessing it's a boy! (But, we have to wai...

How to organize a Bachelorette Party?

Image
It's a wedding season in Nepal, and our very closed friend  Chandu  recently got hitched. To honor her, we threw Bachelorette Party. Here's the  simple tricks and tips to organize it. 1. Photo Booth: For photo booth, we made the photo backdrops out of silver paper plates, tape it carefully so that it overlaps and get the scallop effect. 2.   Photo Props: Please see here for the photo props tutorial. The Fun Props! The Girls! 3. Dress Code: The color coordinating is a fun part for the Bachelorette Night, we made bride-to-be wear a great number in pink and rest of the girls (bridesmaids) wore black dress. Chandu's Bachelorette Night Photo booth 4. Bride-to-be Sash: Obviously to honor Bride-To-Be the sash is must. As these kind of party props are not available in Nepal, I made it out and it was pretty easy. I took the satin cloth, cut in the regular sash size and wrote "Bride-To-Be" in pink, wit...

Featured: Awesome Bookmarks!

Image
Today I am featuring Annika Baini's DIY: Bookmark. I have seen her other works and she's a truly blessed artist. I'm pretty sure, all the book-lovers like me, will instantly fall in love this post.  DIY Boomark Source: Annika Rai Pick your favorite! Source: Annika Rai To start with you will need a chart paper preferably heavy paper and trim it in regular rectangular bookmark dimension.  But, the best part of designing your own bookmark is you can customize its shape and size. Then, put your creative hat on and start decorating your bookmark! It is a very simple and easy-to-make awesome bookmarks and also a great gift idea. Thanks Annika for letting me post your DIY! :)

To The Moon!

Image
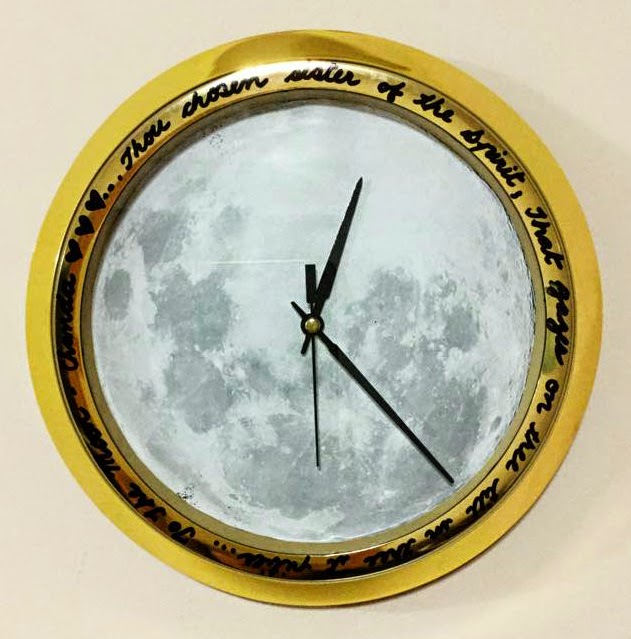
Today's DIY is a personification of a very dear friend and sister - Chanda , who recently tied a nuptial knot. The literal meaning of Chanda is " the moon ", hence I made this customized wall clock specially for her. I wrote down the last para of the poem - 'To The Moon" by Percy Bysshe Shelley on it and presented it on her Bachelorette Night! Thou chosen sister of the Spirit,       That gazes on thee till in thee it pities ... Although, 'To The Moon' is a romantic poem, yet so lonely type of poem, however I have completely different interpretation for Chanda . She is a one-of-a-kind friend and a sister who will always shine amongst  us and will be never alone or lonely! The Moon Clock We love you to the moon and back, Chandu! The Moon Clock in making! SUPPLIES: - Wall Clock  - Moon Picture/ Photo - Glue - Leatherman  - Permanent Marker INSTRUCTIONS: Step#1:  Take a wall ...

Valentine's Special!: Love Cards-DIY

Image
This Valentine's Day show some love to your loved ones by making your own kind of love cards. I have posted very simple and easy to make pop out cards. Love Card #1:You make my heart...POP! Love card 1: You make my heart..POP! Love Card #2:Have you found my heart? Love card 2: Have you found my heart? Love Note #4:Will you be my Valentine! Love notes: Will you be my Valentine! Love Note #4:I'm a sucker for YOU. Be Mine! Love notes: I'm a sucker for YOU. Be MINE! "I'm crazy about you — and I've got the Krazy Glue-splattered furniture and staples in my hands to prove it." -------- If you loved this post, then you might also like: DIY: Tee Bags!

Braided Necklace: DIY!

Image
Yet again another pinspired post...this proves that I'm officially addicted to Pinterest. Pinterest Vs Reality SUPPLIES: 1. Beads  2. Thread & Needle 3. Chain INSTRUCTIONS: Step#1:  I beaded 3 pairs of strings, these bead (potey in Nepali) is easily available at Indrachowk, New Road. Step#2: I simply braided the 3 pairs of strings. Step#3: Finally, I attached the chains to both ends. Braided Necklace DIY If you enjoyed going through this post, then you might also like; DIY: Dreamcatcher Key-ring

DIY: White Mugs!

Image
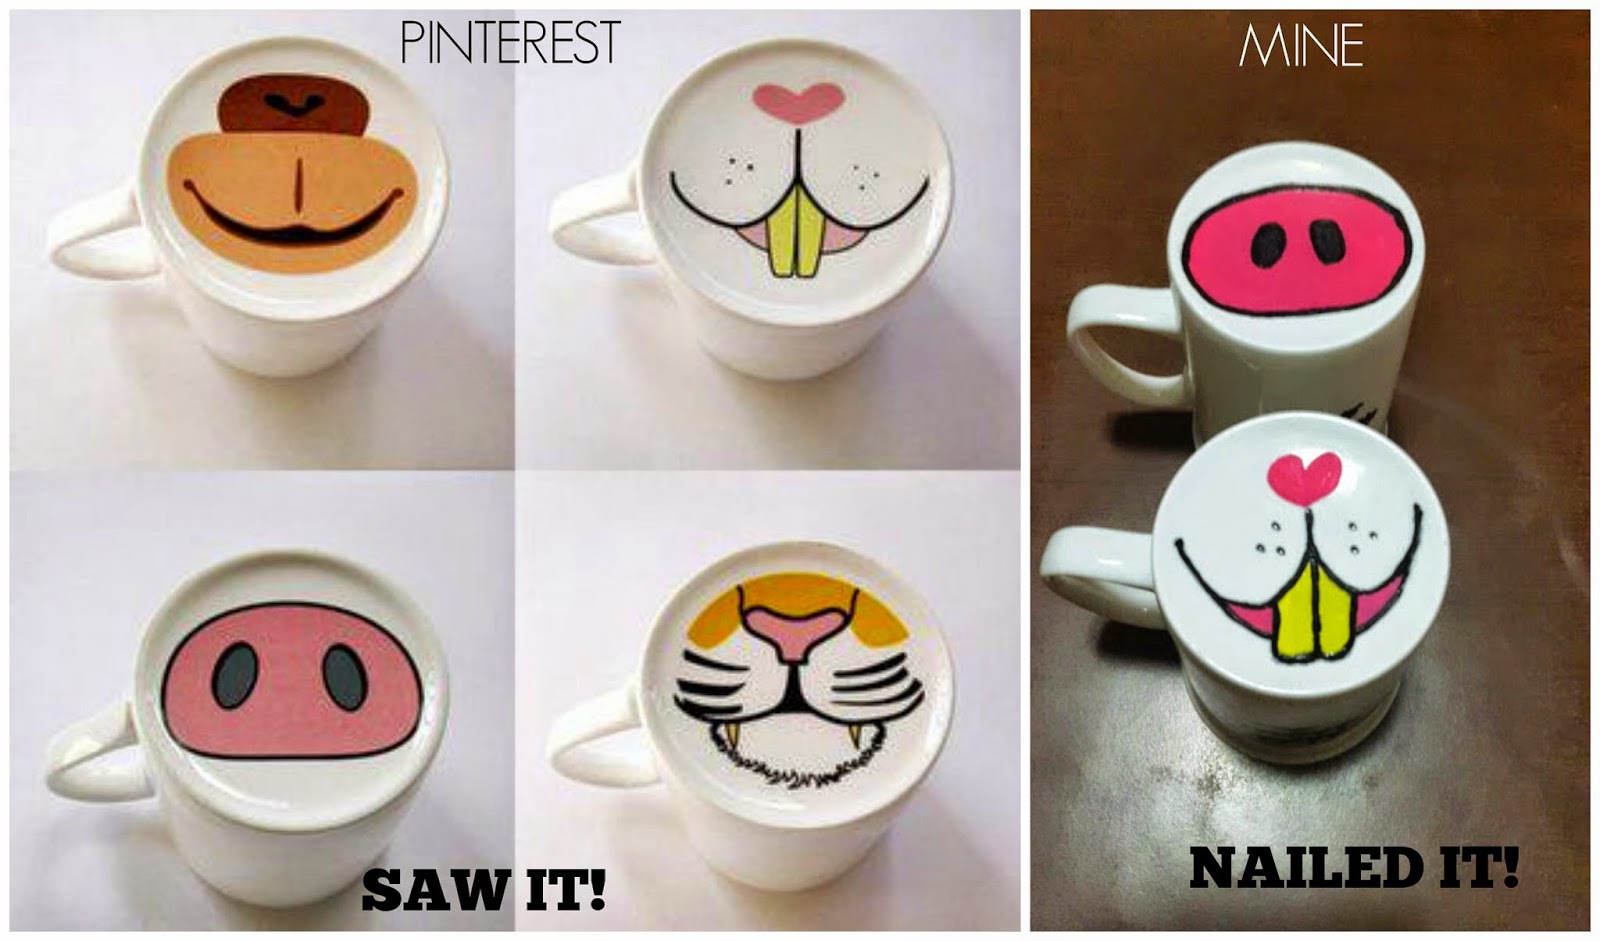
I saw this picture on Pinterest, so I did the same to my new pair of white mugs with piggy snort and bunny teeth. Pinterest Vs Reality My MUGs HERS HIS Very soon...I will be posting similar kind of cups/ mugs DIYs.  Stay tuned!